Introduction to the Best Chicken Kachori
When we talk about authentic street-style snacks, nothing quite matches the irresistible crunch and rich filling of a perfectly made Kachori. Among its many variations, the best chicken Kachori stands out for its bold spices, juicy minced chicken filling, and golden, flaky exterior. This dish blends traditional South Asian flavors with a modern twist, making it a favorite for family gatherings, tea-time snacks, or festive occasions.
We believe that mastering the art of Kachori lies in balancing texture and flavor. The outer shell should be crisp yet delicate, while the inside must be packed with aromatic, well-seasoned keema. Every bite should deliver a satisfying contrast—crispy on the outside, savory and slightly spicy on the inside. This recipe has been carefully crafted to ensure consistent results, whether you are cooking for the first time or refining your culinary skills.
The beauty of this dish is its versatility. You can adjust spice levels, experiment with fillings, and even bake or air-fry for a healthier version. However, the classic deep-fried method remains unmatched when it comes to achieving that iconic crunch. Let’s dive into the details that make this the best chicken Kachori recipe you’ll want to repeat again and again.
Ingredients for Authentic Chicken Kachori
Creating the perfect Kachori starts with selecting the right ingredients. Each component plays a crucial role in building flavor and texture. For the dough, we use all-purpose flour (maida) combined with ghee, which gives the crust its signature flakiness. Unlike oil, ghee adds depth and richness that elevates the entire dish.
The keema filling is where the magic happens. Minced chicken, when cooked with a blend of spices like red chili powder, turmeric, cumin, and garam masala, transforms into a deeply flavorful mixture. The addition of ginger-garlic paste enhances aroma, while finely chopped onions add a subtle sweetness and texture.
Optional ingredients like soy sauce, chili sauce, and cheese introduce a fusion element, making this recipe stand out from traditional versions. These additions are not mandatory, but they provide a modern flavor profile that many food lovers appreciate.
For that extra crisp finish, we prepare a simple mixture of corn flour and ghee, often referred to as roti ghee. This step is often overlooked, but it significantly improves the texture, giving the Kachori a beautiful golden crust with a slight layered effect.
Preparing the Perfect Dough for Kachori
The foundation of any great Kachori lies in its dough. We start by combining maida and salt, ensuring even distribution before incorporating ghee. The key here is to rub the ghee thoroughly into the flour until it resembles coarse crumbs. This technique ensures that the final crust turns out flaky rather than hard or chewy.
Water should be added gradually to form a soft, smooth dough. Over-kneading can make the dough elastic, which is not ideal for Kachori. Instead, we aim for a gentle kneading process that brings everything together without overworking the gluten.
Resting the dough is a critical step that should never be skipped. Allowing it to sit for 15–20 minutes relaxes the gluten, making it easier to roll and shape. This resting period also improves the overall texture, ensuring that the Kachori puffs slightly during frying while remaining crisp.
A well-prepared dough is soft to the touch but not sticky. When pressed lightly, it should bounce back slowly. This balance ensures that the Kachori holds its shape while frying and doesn’t absorb excess oil.
Cooking the Flavorful Chicken Qeema Filling
The heart of the best chicken Kachori is undoubtedly its filling. We begin by heating ghee in a pan, which serves as the base for building layers of flavor. Adding ginger-garlic paste first allows its aroma to infuse the oil, creating a fragrant foundation.
Next, the minced chicken (qeema) is added and sautéed until it changes color. This step locks in the juices and prevents the meat from becoming dry. Finely chopped onions are then introduced, bringing a slight sweetness that balances the spices.
The spice blend is what defines the character of this dish. A combination of chili flakes, red chili powder, turmeric, cumin seeds, coriander powder, and garam masala creates a robust and aromatic profile. Each spice contributes a unique note, resulting in a well-rounded filling.
Optional sauces like soy sauce and chili sauce can be added for a fusion twist, enhancing umami and spice levels. Finally, a touch of cheese can be mixed in for a creamy texture that contrasts beautifully with the crispy shell.
The filling must be cooked until dry and thick. Excess moisture can make stuffing difficult and may cause the Kachori to break أثناء frying. A perfectly cooked filling is cohesive, flavorful, and easy to handle.
Shaping and Assembling the Kachori
Shaping the Kachori requires precision and care. We divide the rested dough into equal portions and roll them into small circles. The size should be manageable—not too thin, as it may tear, and not too thick, as it can result in undercooked layers.
A spoonful of the prepared qeema filling is placed in the center of each circle. The edges are then carefully gathered and sealed, ensuring no gaps remain. Proper sealing is crucial to prevent the filling from leaking أثناء frying.
Once sealed, the stuffed ball is gently flattened into a slightly thick disc. Applying too much pressure can cause the dough to tear, so a light hand is essential. Before frying, we brush the surface with the roti ghee mixture, which enhances crispiness and adds a beautiful golden finish.
This step transforms the texture, giving the Kachori a layered, almost pastry-like quality. It’s a small detail that makes a significant difference in the final result.
Frying Techniques for Crispy Chicken Kachori
Frying is where everything comes together. We heat oil in a deep pan over medium flame. The temperature should not be too high, as this can brown the outside بسرعة while leaving the inside undercooked.
The Kachoris are added carefully, ensuring not to overcrowd the pan. Frying in batches helps maintain consistent oil temperature, which is key to achieving even cooking. As they fry, the Kachoris gradually turn golden brown, developing a crisp exterior.
Patience is essential خلال this process. Slow frying allows the layers to cook thoroughly, resulting in a crunchy yet light texture. Once done, the Kachoris are removed and placed on paper towels to absorb excess oil.
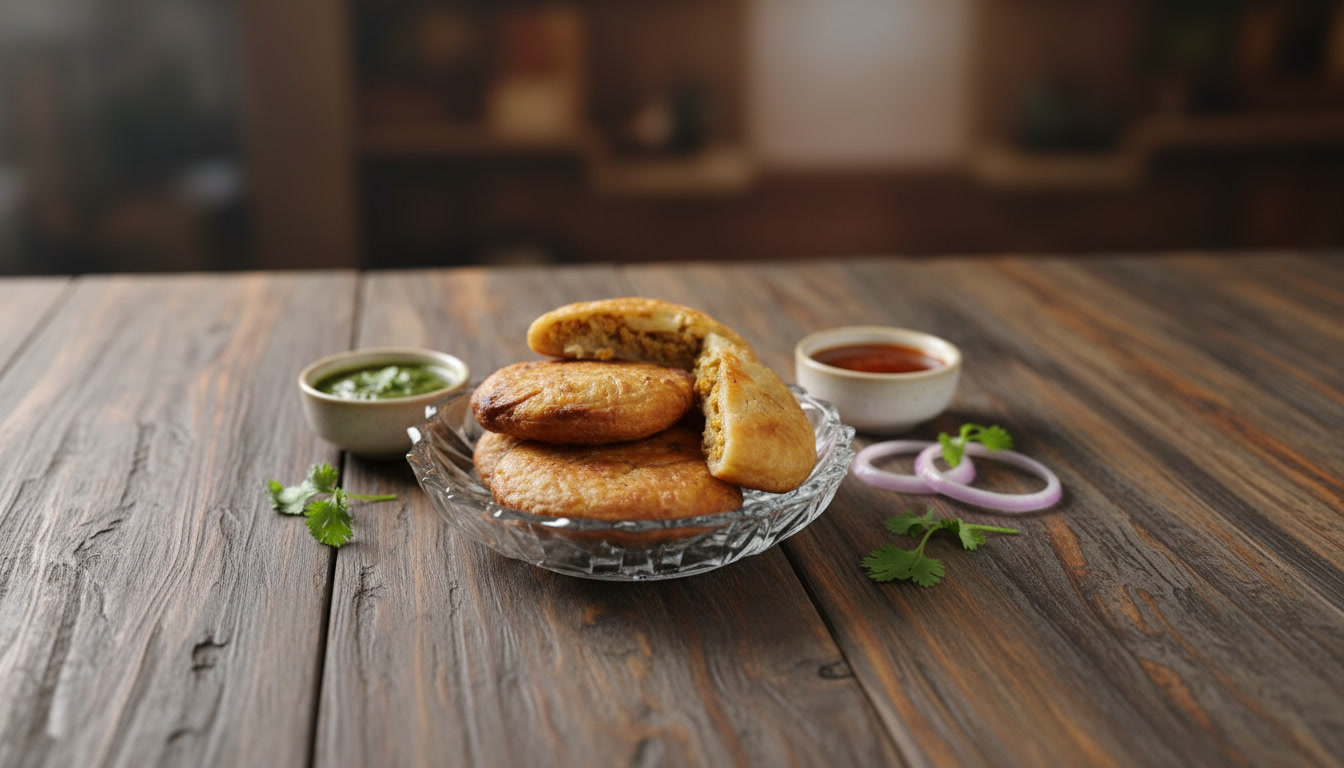
The result is a perfectly fried chicken Kachori—crispy, golden, and filled with aromatic keema. Each bite delivers a satisfying crunch followed by a burst of flavor.
Qeema Kachori Recipe – Crispy Chicken Stuffed Kachoris
Ingredients
For Dough
- 2 Cups Maida All-Purpose Flour
- ½ Tbsp Salt
- 3 Tbsp Ghee Not Oil
- Water As Needed
For Roti Ghee
- 2 Tbsp Corn Flour
- 5 Tbsp Ghee
For Qeema Filling
- ½ Kg Chicken Qeema Minced Chicken
- 1 Tbsp Chili Flakes
- ½ Tbsp Red Chili Powder
- ¾ Tbsp Salt
- 2 Tbsp Ghee
- 1 Small Onion Finely Chopped
- 1 Tbsp Ginger-Garlic Paste
- ½ Tbsp Cumin Seeds Zeera
- ½ Tbsp Dry Coriander Powder
- 1 Tsp Turmeric Powder Haldi
- ½ Tbsp Garam Masala
- 2 Tbsp Soy Sauce Optional
- 2 Tbsp Chili Sauce Optional
- 2 Tbsp Cheese Optional
Instructions
Step 1: Prepare the Dough
- Combine maida and salt in a bowl.
- Rub in ghee until mixture is crumbly.
- Gradually add water and knead into a soft, smooth dough.
- Cover and rest for 15–20 minutes.
Step 2: Prepare Roti Ghee
- Mix corn flour and ghee.
- Keep aside to brush on kachoris later for extra crispiness.
Step 3: Cook the Qeema Filling
- Heat 2 tbsp ghee in a pan.
- Sauté ginger-garlic paste until fragrant.
- Add chicken qeema and roast for 2 minutes.
- Add onion and cook until translucent.
- Mix all spices: chili flakes, red chili powder, turmeric, cumin, dry coriander, garam masala, and salt.
- Add soy sauce and chili sauce (optional) and cover.
- Cook until chicken is fully done.
- Stir in cheese at the end.
Step 4: Shape the Kachoris
- Divide dough into small balls.
- Roll into small circles.
- Place a spoonful of qeema filling in the center.
- Seal the edges tightly and roll gently into a slightly flat circle.
- Brush the top with roti ghee mixture for crispiness.
Step 5: Fry the Kachoris
- Heat oil on medium flame in a deep pan.
- Fry stuffed kachoris until golden brown and crispy.
- Drain on paper towels to remove excess oil.
Notes
Tips for Perfect Qeema Kachori
- Ensure qeema filling is thick for easier stuffing.
- Rest dough before rolling for soft texture.
- Brush roti ghee mixture for a golden, crispy finish.
- Fry on medium heat for even cooking.
- Serve immediately for the best flavor and crunch.
Tips for Making the Best Chicken Kachori
Achieving perfection with Kachori comes down to attention to detail. Ensuring the filling is thick prevents leakage and makes shaping easier. Resting the dough improves elasticity and texture, making it easier to work with.
Brushing the Kachori with roti ghee before frying adds an extra layer of crispiness that sets this recipe apart. Maintaining the right oil temperature ensures even cooking and prevents the Kachoris from becoming greasy.
Serving the Kachori immediately after frying guarantees the best experience. The contrast between the hot, crispy shell and the flavorful filling is at its peak when fresh.
Serving Suggestions and Variations
The best chicken Kachori can be enjoyed on its own or paired with chutneys like mint chutney or tamarind sauce. These condiments add freshness and tanginess, enhancing the overall flavor profile.
For a modern twist, Kachoris can be served with yogurt dips or even turned into a chaat-style dish by topping them with chutneys, onions, and spices. This versatility makes them suitable for both traditional and contemporary presentations.
Conclusion
The journey to creating the perfect Kachori is one of technique, patience, and flavor balance. By focusing on quality ingredients, precise preparation, and careful cooking, we achieve a dish that stands out as the best chicken Kachori. This recipe delivers consistent results, combining crisp texture with a rich, aromatic filling that satisfies every craving.
FAQs
- What makes this the best chicken Kachori recipe?
The combination of a flaky dough, well-spiced keema filling, and proper frying technique ensures superior taste and texture. - Can we bake chicken Kachori instead of frying?
Yes, baking is possible, but frying delivers the authentic crispiness associated with traditional Kachori. - How do we prevent Kachori from breaking أثناء frying?
Ensure the filling is dry and the edges are sealed tightly before frying. - Can we store Kachori for later use?
Yes, they can be refrigerated and reheated, but fresh Kachori offers the best flavor and texture. - What oil is best for frying Kachori?
Neutral oils with high smoke points, such as vegetable or canola oil, work best for frying.